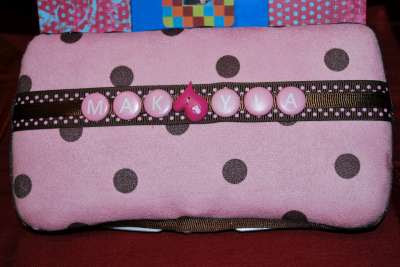
I've had a busy week making baby gifts. My cousin, Betina, will be having a baby shower this weekend and I have a few other friends that I will be taking gifts to when I go home for the shower. I thought I'd share what I've been working on.
I transformed this wall hanging from chic...

You may be wondering why someone would want a flower or dragonfly with a bunch of ribbons hanging from it. Well, it is technically a bow holder...a necessity for any young girl.
Here are a few samplings of the bows I've been making...

It's like anything, practice makes perfect. I kind of feel sorry for those that receive gifts from me during the "trial and error" stage! :) I've learned a lot from my mistakes.
Here's my all time favorite gift (for now!).
1. Purchase a $1 wooden picture frame from Michael's and remove cardboard paper in center.
2. I've learned a few things since my first attempt at this and I believe it's easiest if you paint mod podge on the frame then lay it face down on the wrong side of scrapbook (decorative) paper or fabric. Make sure you leave a 1" border.
3. Use a credit card or PC scraper to push any bubbles to the outside. The goal is for the paper to lay flat against the frame.
4. Next, bend the paper along the sides of the frame until you have a nice crease. You want to continue this process for all four sides, making sure the paper has two creases on each side.
5. Now paint mod podge along the edge of the frame (under the paper) and then smoothe the paper on top of the glue. It should bend around the edge as in the picture below. Think, wrapping a gift.

6. Cut an X in the paper where it covers the "picture" area. Fold the paper in until the triangle that has formed is now touching the back of the frame. Be sure to crease the paper as it moves across any edges. Use mod podge to adhere it to the frame as well.
7. Once the mod podge has dried, mod podge the right side of the paper. This acts as a sealant. Let dry. The end.
Here are some frames I made for a friend who did her nursery in firetrucks. I couldn't find any cutesy firetruck themed paper so I bought some scrapbook stickers and mod podged them to the paper as well. This particular paper had a fun texture and I really like the way it turned out.
Here are some frames I made for a friend who did her nursery in firetrucks. I couldn't find any cutesy firetruck themed paper so I bought some scrapbook stickers and mod podged them to the paper as well. This particular paper had a fun texture and I really like the way it turned out.
You need a taggie!!
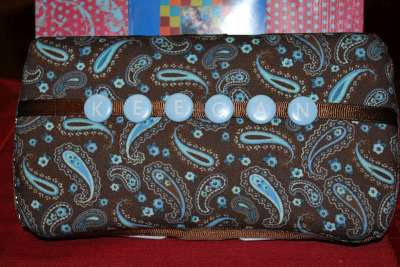
Keegan...have you ever heard of this name? I haven't, but I love it!
This is for my cousin who hasn't decided on a name yet. She is having a girl...or so they say. She had a baby five years ago that was 100% girl...according to the ultrasounds. When she gave birth the doctor said, "You have a healthy baby boy."
And she said, "You're kidding me!!"
Oops.
They also make boy patterns (dump trucks, etc.)!


5 comments:
Love it all - you are so talented!
Baby Hayden says your welcome for the inspiration, and he, and his mom, LOVE his wipe case.
I love the picture frame ideas...especially the ones with the firetruck/firemen...too cute...may have to "steal" your idea and make some for Christopher's train bedroom. Keep the ideas comin'!!! I love stealing or shall I say borrowing creativity from other people!! :)
I love looking at all the things you make. So creative.
Hey, I had to steal it from someone too! You know I didn't come up with any of that on my own...haha...steal away!!
Post a Comment